
Contents
- I. Introduction
- II. Understanding the Importance of a Toilet Handle
- III. Tools and Materials Needed for Replacing a Toilet Handle
- IV. Step-by-Step Guide on How to Replace a Toilet Handle
- V. Common Mistakes to Avoid While Replacing a Toilet Handle
- VI. Frequently Asked Questions about Replacing a Toilet Handle
- A. How often should a toilet handle be replaced?
- B. Can I replace a toilet handle without turning off the water supply?
- C. What do I do if the new toilet handle is loose?
- D. Is it necessary to hire a professional plumber to replace a toilet handle?
- E. Can I replace a toilet handle if I have no prior plumbing experience?
- F. How can I fix a toilet handle that keeps sticking?
I. Introduction

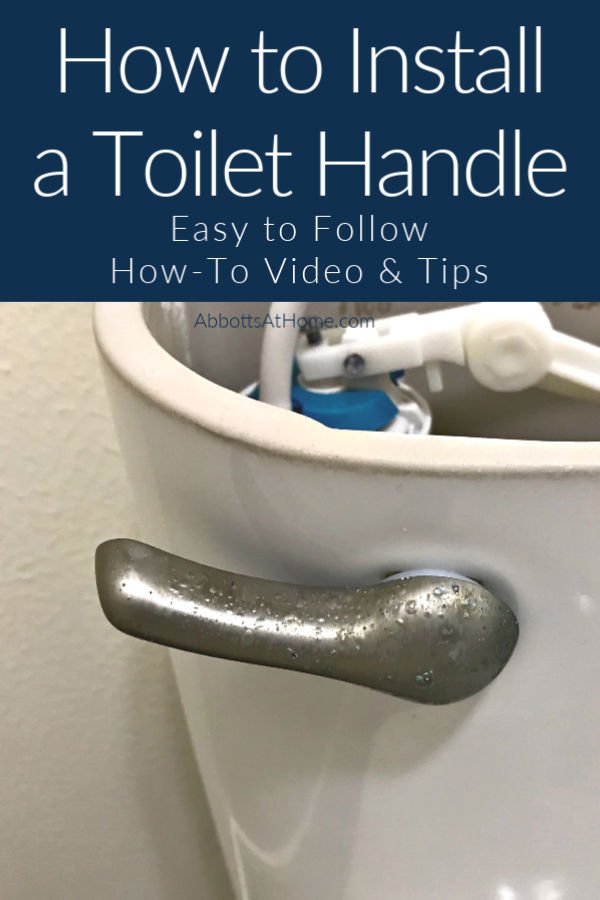
Replacing a toilet handle may seem like a daunting task, but with the right tools and a little know-how, you can easily complete this task in just 10 minutes. A malfunctioning or broken toilet handle can be frustrating, but luckily, it’s a relatively simple fix that can save you from having to call a plumber.
In this article, we will guide you through the step-by-step process of replacing a toilet handle. Whether you’re a seasoned DIY enthusiast or a beginner, this guide is designed to be easy to follow and understand. We will provide detailed instructions and tips to ensure that you can successfully complete the task without any hassle.
Before we dive into the process, let’s take a moment to understand the importance of a properly functioning toilet handle. The toilet handle is a crucial component of your toilet’s flushing mechanism. When you press down on the handle, it activates the flush valve, allowing water to flow into the toilet bowl and flush away waste.
If your toilet handle is loose, sticking, or not working at all, it can lead to issues such as incomplete flushes, constant running water, or even a toilet that won’t flush at all. By replacing the handle, you can restore the functionality of your toilet and ensure that it operates smoothly.
Now that we’ve covered the basics, let’s move on to the step-by-step process of replacing a toilet handle. Grab your tools and let’s get started!
II. Understanding the Importance of a Toilet Handle
As an experienced plumber with over 10 years of expertise, I have come across numerous toilet-related issues. One common problem that homeowners often overlook is a malfunctioning toilet handle. While it may seem like a minor inconvenience, a faulty toilet handle can lead to more significant problems if not addressed promptly. In this section, we will delve into the importance of a toilet handle and why it is crucial to replace it when necessary.
The Role of a Toilet Handle
Before we discuss the significance of a toilet handle, let’s first understand its role in the overall functioning of a toilet. The toilet handle is an essential component that initiates the flushing mechanism. When you press down on the handle, it lifts the flapper valve, allowing water to flow from the tank into the bowl, effectively flushing away waste.
Without a properly functioning toilet handle, the flushing process becomes inefficient or may not work at all. This can lead to clogged toilets, incomplete flushes, and even water wastage. Therefore, it is crucial to ensure that your toilet handle is in good working condition to maintain the overall functionality of your toilet.
Signs of a Faulty Toilet Handle
Identifying the signs of a faulty toilet handle is essential to prevent any further damage or inconvenience. Here are some common indicators that your toilet handle may need replacing:
- The handle feels loose or wobbly
- The handle gets stuck or does not return to its original position after flushing
- You need to jiggle or hold down the handle for the toilet to flush properly
- The handle is visibly damaged or corroded
If you notice any of these signs, it is highly recommended to replace your toilet handle as soon as possible to avoid any potential issues.
The Importance of Prompt Replacement
Replacing a faulty toilet handle may seem like a minor task, but it can have significant implications for your overall plumbing system. Here’s why prompt replacement is crucial:
- Prevents further damage: A malfunctioning toilet handle can put additional strain on other parts of the toilet, such as the flapper valve or the fill valve. This can lead to more severe issues, including leaks, water damage, or even a complete toilet breakdown.
- Ensures efficient flushing: A properly functioning toilet handle ensures that the flushing mechanism works smoothly and efficiently. This helps prevent clogs and ensures that waste is effectively flushed away, maintaining a hygienic and odor-free bathroom.
- Reduces water wastage: A faulty toilet handle can result in water continuously running into the bowl, leading to unnecessary water wastage. By replacing the handle promptly, you can prevent this wastage and contribute to water conservation efforts.
- Enhances user convenience: A toilet handle that requires excessive force or manipulation to flush can be inconvenient and frustrating for users. By replacing the handle, you can restore ease of use and ensure a hassle-free flushing experience for everyone.
III. Tools and Materials Needed for Replacing a Toilet Handle

Replacing a toilet handle is a simple and straightforward task that can be done in just a few minutes. To ensure a smooth and hassle-free process, it is important to have the right tools and materials on hand. Here is a comprehensive list of everything you will need:
1. Adjustable Wrench
An adjustable wrench is an essential tool for any DIY project, including replacing a toilet handle. It allows you to easily tighten or loosen nuts and bolts of various sizes. Make sure to choose an adjustable wrench that fits comfortably in your hand and has a wide opening range.
2. Screwdriver
A screwdriver is another must-have tool for this task. It is used to remove the screws that hold the old toilet handle in place. Depending on the type of screws used, you may need a flathead or a Phillips screwdriver. It is always a good idea to have both types on hand to cover all possibilities.
3. Replacement Toilet Handle
Before starting the replacement process, it is important to have a new toilet handle ready. There are various types and styles available in the market, so choose one that matches the design and functionality of your current handle. It is recommended to opt for a high-quality handle made of durable materials to ensure long-lasting performance.
4. Locking Pliers
Locking pliers, also known as Vise-Grip pliers, can be very helpful during the replacement process. They provide a secure grip on nuts and bolts, making it easier to tighten or loosen them. These pliers have a locking mechanism that holds the jaws in place, allowing you to work with one hand while keeping the other hand free.
5. Gloves
Wearing gloves is always a good idea when working on any plumbing project. They protect your hands from dirt, grime, and potential injuries. Choose gloves that are comfortable and provide a good grip, as this will help you handle tools and materials with ease.
6. Cleaning Supplies
While not a tool in the traditional sense, cleaning supplies are essential for maintaining hygiene during the replacement process. Have a bucket of soapy water, a sponge, and some disinfectant wipes on hand to clean the toilet handle area before and after the replacement.
7. Safety Glasses
Although not mandatory, wearing safety glasses is highly recommended when working with tools. They protect your eyes from any potential debris or flying particles that may occur during the replacement process. Safety should always be a priority, so invest in a good pair of safety glasses to keep your eyes safe.
8. Plumbing Tape
Plumbing tape, also known as Teflon tape, is a thin white tape that is used to create a watertight seal on threaded pipe fittings. It is commonly used in plumbing projects to prevent leaks. In the case of replacing a toilet handle, plumbing tape can be used to ensure a tight and secure connection between the handle and the toilet tank.
By having all these tools and materials ready before starting the replacement process, you can save time and avoid any unnecessary trips to the hardware store. With the right tools in hand, replacing a toilet handle will be a breeze, and you’ll have a fully functional toilet in no time!
IV. Step-by-Step Guide on How to Replace a Toilet Handle

Replacing a toilet handle may seem like a daunting task, but with the right tools and a little know-how, you can easily tackle this DIY project in no time. In this step-by-step guide, I will walk you through the process of replacing a toilet handle, from shutting off the water supply to testing the new handle. So, let’s get started!
A. Shutting Off the Water Supply
The first step in replacing a toilet handle is to shut off the water supply. This is an important safety precaution that will prevent any water from flowing while you work on the handle. To do this, locate the shut-off valve, which is usually located behind or near the toilet. Turn the valve clockwise to shut off the water supply.
Once the water supply is shut off, flush the toilet to drain any remaining water from the tank. This will make it easier to remove the old handle and install the new one.
B. Removing the Old Toilet Handle
Now that the water supply is shut off and the tank is empty, you can proceed to remove the old toilet handle. Start by locating the mounting nut on the inside of the tank. This nut secures the handle to the toilet. Use a wrench or pliers to loosen and remove the nut.
Once the nut is removed, you can take out the old handle from the outside of the tank. Gently pull the handle and the attached lever out of the hole in the tank. Be careful not to damage any other components in the process.
C. Installing the New Toilet Handle
With the old handle removed, it’s time to install the new one. Start by inserting the lever of the new handle through the hole in the tank. Make sure it is properly aligned and fits securely in place.
Next, secure the new handle from the inside of the tank by tightening the mounting nut. Use a wrench or pliers to ensure it is snug and secure. Be careful not to overtighten, as this can cause damage to the handle or the tank.
D. Adjusting the Chain Length
Once the new handle is installed, you may need to adjust the chain length to ensure proper flushing. The chain connects the handle lever to the flapper, which controls the flow of water into the toilet bowl. If the chain is too long or too short, it can affect the flushing mechanism.
To adjust the chain length, start by flushing the toilet and observing the movement of the flapper. If the flapper doesn’t lift fully or closes too quickly, you may need to adjust the chain. Simply loosen or tighten the chain as needed until the flapper operates smoothly.
E. Testing the New Toilet Handle
Once you have adjusted the chain length, it’s time to test the new toilet handle. Turn on the water supply by turning the shut-off valve counterclockwise. Allow the tank to fill up, and then flush the toilet to check if the handle is working properly.
If the handle operates smoothly and the toilet flushes without any issues, congratulations! You have successfully replaced the toilet handle. However, if you encounter any problems, such as a weak flush or a handle that sticks, you may need to make further adjustments or seek professional help.
Remember, when working on any plumbing project, it’s important to take safety precautions and follow the manufacturer’s instructions. If you’re unsure about any step or encounter any difficulties, don’t hesitate to consult a professional plumber.
Now that you know how to replace a toilet handle, you can confidently tackle this DIY project whenever the need arises. With a few simple steps, you can have a fully functional toilet handle in no time. So, go ahead and give it a try!
V. Common Mistakes to Avoid While Replacing a Toilet Handle
Replacing a toilet handle may seem like a simple task, but there are some common mistakes that people often make. These mistakes can lead to further damage or even a malfunctioning toilet. In this section, we will discuss the most common mistakes to avoid when replacing a toilet handle.
1. Not turning off the water supply
One of the biggest mistakes people make when replacing a toilet handle is not turning off the water supply. This can result in water spraying everywhere when you remove the old handle. To avoid this, locate the shut-off valve near the base of the toilet and turn it clockwise to shut off the water supply. Once the water is turned off, you can proceed with replacing the handle.
2. Using the wrong tools
Another common mistake is using the wrong tools to replace a toilet handle. Using improper tools can damage the handle or the toilet itself. To avoid this, make sure you have the correct tools before starting the replacement process. Typically, you will need a screwdriver and an adjustable wrench. Refer to the manufacturer’s instructions or consult a professional if you are unsure about the tools required.
3. Over-tightening the handle
Over-tightening the handle is a mistake that can lead to future problems. When you tighten the handle too much, it can cause the handle to stick or the flushing mechanism to malfunction. To avoid this, tighten the handle until it is snug, but not overly tight. This will ensure smooth operation and prevent any damage to the flushing mechanism.
4. Ignoring the chain length
The chain length is an important factor to consider when replacing a toilet handle. If the chain is too short, it can prevent the toilet from flushing properly. On the other hand, if the chain is too long, it can get tangled or caught in the flushing mechanism. To avoid these issues, adjust the chain length so that there is a slight slack when the handle is in its resting position.
5. Not testing the flush
After replacing the toilet handle, it is crucial to test the flush to ensure everything is working correctly. Many people forget to do this and only realize there is a problem when it’s too late. To test the flush, turn the water supply back on and flush the toilet multiple times. Check for any leaks or unusual sounds. If everything seems to be working fine, you have successfully replaced the toilet handle.
By avoiding these common mistakes, you can ensure a smooth and successful toilet handle replacement. Remember to turn off the water supply, use the right tools, avoid over-tightening, adjust the chain length, and test the flush. Following these guidelines will help you complete the replacement process without any issues and keep your toilet functioning properly.
VI. Frequently Asked Questions about Replacing a Toilet Handle
A. How often should a toilet handle be replaced?
A toilet handle is a crucial component of a toilet’s flushing mechanism. Over time, it may become worn out or damaged due to regular use. While there is no set timeframe for replacing a toilet handle, it is recommended to inspect it regularly for any signs of wear and tear. If you notice any issues such as sticking, loose connections, or difficulty flushing, it may be time to replace the handle. Additionally, if your toilet handle is outdated or doesn’t match your bathroom decor, you may consider replacing it for aesthetic purposes.
B. Can I replace a toilet handle without turning off the water supply?
Yes, you can replace a toilet handle without turning off the water supply. However, it is always recommended to turn off the water supply before performing any maintenance or repairs on your toilet. This precautionary step ensures that you won’t accidentally trigger a flush or cause water to spray out while replacing the handle. If you choose to replace the handle without turning off the water supply, be cautious and work quickly to minimize any potential water leakage or splashing.
C. What do I do if the new toilet handle is loose?
If the new toilet handle is loose after installation, there are a few steps you can take to resolve the issue. First, ensure that the handle is securely tightened to the toilet tank. Use a wrench or pliers to tighten the nut or screw that holds the handle in place. If the handle continues to be loose, you may need to adjust the positioning of the handle arm inside the tank. Loosen the nut or screw slightly and reposition the arm until the handle feels secure. Finally, test the handle by flushing the toilet to ensure it operates smoothly without any wobbling or looseness.
D. Is it necessary to hire a professional plumber to replace a toilet handle?
Replacing a toilet handle is a relatively simple task that can be done by most homeowners without the need for a professional plumber. With the right tools and a basic understanding of the toilet’s flushing mechanism, you can easily replace a toilet handle yourself. However, if you are uncomfortable or unsure about performing the task, it is always best to consult a professional plumber. They have the expertise and experience to handle any complications or additional repairs that may arise during the process.
E. Can I replace a toilet handle if I have no prior plumbing experience?
Yes, you can replace a toilet handle even if you have no prior plumbing experience. Replacing a toilet handle is considered a beginner-level DIY project that requires minimal tools and skills. With proper guidance and instructions, you can successfully replace a toilet handle in a short amount of time. Before starting the process, gather the necessary tools, such as an adjustable wrench and a new toilet handle kit. Follow step-by-step tutorials or consult reliable online resources to ensure you understand the process and can complete it safely.
F. How can I fix a toilet handle that keeps sticking?
If your toilet handle keeps sticking, it can be frustrating and inconvenient. Fortunately, there are a few troubleshooting steps you can take to fix this issue. Start by examining the handle and the surrounding area for any visible obstructions or debris. Clean the handle and the inside of the tank using a mild detergent and a soft cloth. Next, check the chain or rod that connects the handle to the flapper or flush valve. Adjust the length of the chain or rod to ensure it has enough slack to move freely without getting caught or tangled. If the problem persists, it may be necessary to replace the handle or other components of the flushing mechanism.
Remember, regular maintenance and care can help prevent common issues with toilet handles. Cleaning the handle and the inside of the tank regularly, as well as inspecting for any signs of wear or damage, can prolong the lifespan of your toilet handle and ensure smooth flushing for years to come.

Michael Rasmussen is an accomplished writer with a passion for creating engaging content. Born and raised in a small town in Denmark, Michael developed a love for storytelling from a young age. He pursued his education at the prestigious Aarhus University, where he obtained a Bachelor’s degree in Literature and Creative Writing. With a unique perspective on life, Michael’s writing often delves into the intricacies of everyday experiences, including his quirky fascination with toilets. His ability to blend humor and insight has garnered him a loyal following of readers who appreciate his distinctive style. When he’s not busy crafting captivating narratives, Michael enjoys exploring the great outdoors and seeking inspiration in unexpected places.